
This is the first of a two-part article about RF when you are operating “in the field,” meaning away from a fixed station.
For example, when you are operating a portable station for Parks On The Air (POTA), that’s considered “in the field” whether you are in an actual field or a parking lot or not even outside. Field Day certainly qualifies in most cases.
Because these are temporary situations, you have to apply a different set of techniques to get everything working and keep it working.
“RF Management”–What Does That Mean?
In both parts of this article, I’ll consider the RF to be from your transmitted signal. There is certainly RF floating around from other signals, and some might be very strong, but let’s deal with your transmitted signal here.
What does the “management” part mean, though?
I have been using the term to include all of the various techniques that are used to keep our RF where it belongs and out of where it doesn’t belong. That includes configuring your station so that it performs correctly when you are transmitting. So, we are going “manage” how your station performs when the strong RF is present.
As you’ll see, that covers a surprisingly wide range of concerns.
Where Is the RF?
Better to ask, Where isn’t the RF? That is really a better question than the first part.
We tend to think of our station as “over here” and the antenna radiating RF as “over there,” so the RF just flies away in the direction of other stations. Well, not quite. You, the operator, and your station are very, very close to where that strong RF is launched, at least electrically.
Let’s ask a question: What is the wavelength of a 40 meter signal?
Not a trick question! It’s about 40 meters, which is about 132 feet. More specifically, a 7.15 MHz signal has a wavelength of about 42 meters, which is about 137 feet.
Note that only two of the HF bands contain the wavelength by which they’re known: 160 meters at 1.875 MHz and 80 meters at 3.75 MHz.
If your 40 meter antenna is closer to you than about 1/2 wavelength, or 60-something feet, you’re right in the near field of the antenna! It takes another 100 feet or more to get you out of the strong RF field.
The resulting strength of your signal is going to be STRONG!
As a result, RF is going to be picked up by just about every bit of conductive material within 100 feet or more of the antenna. Pro tip—you are conductive as well.
Everything in your station—everything—is going to have RF voltage and RF current on it. Unless you are operating in a metal shipping container, you might as well figure out how to deal with RF.
Let’s start with your station equipment.
RF and the Equipment Table—Bonding
Take a look at your typical portable setup. There will be a radio, power supply, maybe an antenna tuner, a laptop or tablet for logging and digital modes, headphones or other audio gear, and a gadget or two. All of these are connected together with short antennas…er…wires and cables.
If you just throw everything on the table and hook it all up, there are lots of paths for RF to follow. Some might be low impedance so the RF current is high, and some might be high impedance so the RF voltage is high. The end of any unconnected wire or cable will be a high impedance point and that’s where you get an “RF burn”—on microphones, keys, and isolated metal boxes. You never forget an RF burn on your lips from touching a “hot” metal microphone!
These aren’t particularly hazardous, but they are obnoxious!
Even more obnoxious is equipment misbehaving when you press the key or mike switch. Maybe an automatic tuner decides to suddenly re-tune, a computer keyboard freezes up, or a radio changes a setting. This is caused by RF current getting into (or out of) something it shouldn’t. And what causes RF current to flow? RF voltage! More specifically, a difference of RF voltage between pieces of equipment.
If you can minimize the difference in voltage between pieces of equipment, you will also minimize RF current flowing between them along connecting cables.
That’s what bonding does for you.
If you look up “bonding” in an electrical dictionary, you’ll find that it is “a connection between two points to keep them at the same potential or voltage.” That’s all—no fancy implications or calculations. You just want to keep everything on the equipment table at the same voltage, and you do that by bonding them together with heavy wires or straps. The wires and straps should be short so they don’t have an appreciable impedance of their own.
In a portable setup, the easiest way to bond everything is to connect all of the equipment directly together. Have an assortment of jumper wires (#12-16 is good) or straps (flat tinned braid works well) that connect to screws on the metal enclosures. Powerpole connectors on the wires allow the equipment to be bonded however you arrange it. I recommend using green wire insulation and connector bodies, signifying a ground connection.
Another option is to put some aluminum foil under all the equipment and connect the enclosures to it with heavy test clip leads (#18 or heavier). The metal surface helps equalize voltage.
This is a great addition to any go-kit and has saved Field Day for me more than once.
The foil weighs hardly anything, so you can even use it for Summits On The Air (SOTA) stations carried in your pack. When you’re done, wad it up and recycle it. The foil surface should be big enough to cover a strip under all your equipment. I find a three-to-four-foot strip is more than adequate.
RF and the Station Wiring
What about all those cables connecting everything together? There are three basic techniques that will reduce or eliminate most RF problems:
- Use the shortest cables you can. One-foot USB and audio cables are available.
- Coil up excess cable in a figure-8 to minimize its inductance and the RF voltage it will pick up.
- Use shielded cables for everything and avoid plastic, unshielded boxes for equipment enclosures.
- Have Type/Mix 31 (preferred) or 43 ferrite clamp-on cores available.
What is a figure-8 winding? This is a handy technique for all kinds of cable, including coax feed lines, power cables, and extension cords. The basic idea is illustrated in the last half of this YouTube video on cable winding for video work. If you practice these techniques, you’ll avoid creating a spiral twist that creates kinks. For small cables, you can wind the figure-8, then fold the two halves together. Winding half the turns in opposite directions causes a magnetic field to create equal-but-opposite voltages in the coil, minimizing RF pickup.
If you use the aluminum foil approach or have a metal table, lay the cables, including the excess length all coiled up, on the foil. That minimizes the length of cable exposed to the RF fields.
If you do need the ferrite cores, place them on the affected cable as close to the equipment experiencing interference as possible. Wind several turns of the cable onto the core before snapping it shut. Be sure both surfaces of the core are flat against each other. This creates an impedance that blocks the RF current where it is getting into the equipment.
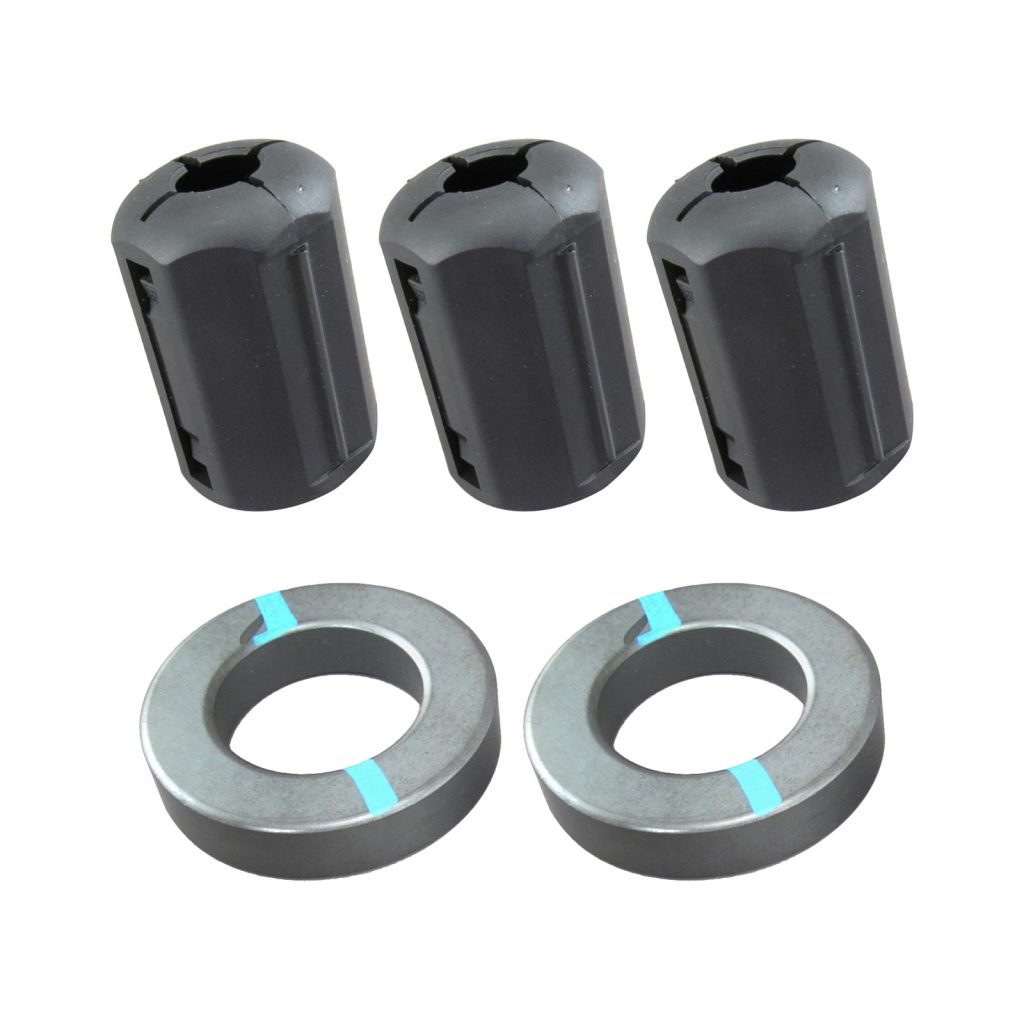
If you’re not sure what mix makes up a “mystery core,” it’s worth buying a half dozen, then labeling or color coding them as in this photo of a ferrite core kit. The toroids can be used to wind multiple turns of coax and power cords. Snap-ons can be labeled with a permanent marker or colored tape.
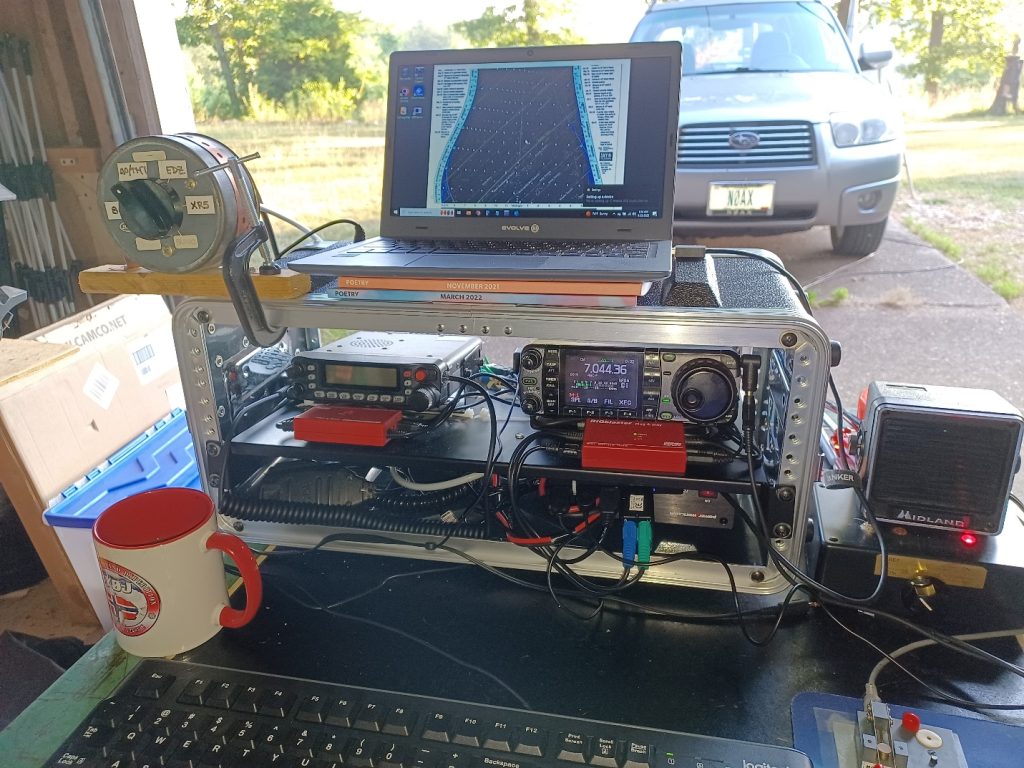
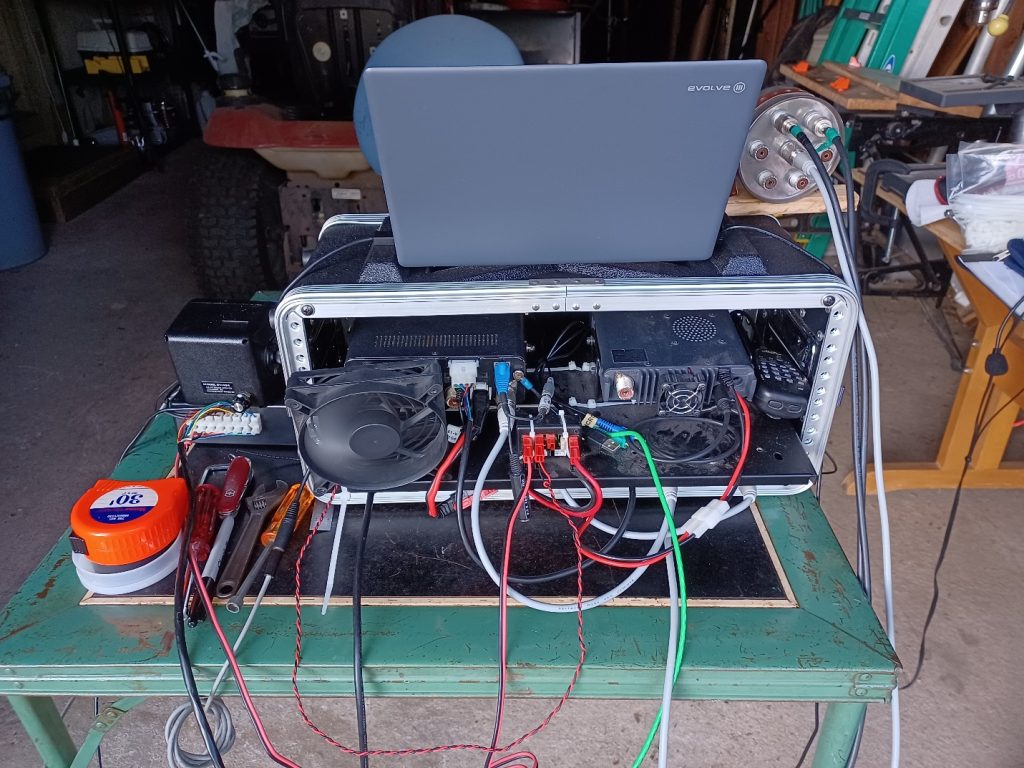
A combination approach that accomplishes bonding and keeps all of your equipment together is a portable rack. These have metal shelves and rails with an overall plastic enclosure. They’re usually available as portable audio equipment racks.
You can install all of your portable equipment more or less permanently in one of these racks. This lets you bond everything, use short cables, and debug all of the wiring so that when you take the rack of gear to the field, you know it will work with a minimum amount of setup.
True, a rack is heavier and not suitable for backpacking, but for many portable vehicle-based scenarios, it will be just fine.
These photos are from my Field Day operation in 2023 showing an IC-7000 and an FT-7900 in a standard portable audio rack. All of the equipment is bonded to the metal rack shelf. The operating table is my great-Aunt Ruth’s!
Despite your best efforts—and every field setup is different—you may find that transmitting on a particular band “lights up” the station equipment (or the operator). You might see RF interference to equipment, or a “hot spot” may cause a tingle (or more!) on some frequencies.
In this case, use a 1/4-wavelength piece of wire (calculate as 470/f in MHz–length is not critical) attached to the affected equipment on one end with an alligator clip and left open on the other. Insulate the open end.
This detuning wire will create a low-impedance point, lowering RF voltage where the wire is attached. The open end may have high voltages on it, so insulate it and don’t put it where you might touch it or step on it with bare feet! (Don’t ask me how I learned this…) Have one detuning wire for each band you plan on using.
RF on the Antenna System
Other than on the antennas themselves, as discussed earlier, RF is going to be picked up by every conductor in your station, including by the antenna feed lines as common-mode current. This is a particular challenge in mobile operation since the vehicle body is part of the antenna. The RF picked up by the feed line will flow into your station and cause problems unless you take steps to block it:
- Use a common-mode choke (ferrite or wound-coax) where the feed line attaches to station equipment.
- Add one or more chokes along the feed line between the station and antenna. If you are using an end-fed half-wave (EFHW) antenna, a choke at the impedance transformer may affect the antenna’s SWR. Check the antenna manual for guidance.
- If you are using a vertical antenna, such as a whip with a base-loading coil close to the ground, place some chicken wire or hardware cloth under the antenna to act as a ground plane. Route the feed line underneath it to maximize the shielding effect.
- If your antenna is mounted on a vehicle, bond the antenna mount to the body with a heavy wire as close to the mount as possible. This helps keep the feed line from becoming part of the antenna.
- In a vehicle, operate with the doors closed to keep RF on the outer surfaces. A ferrite choke where a feed line enters the vehicle is also helpful.
Finally, what about a ground connection to the Earth itself?
Generally, you don’t need one! Most generators do not require a ground rod or connection—check the manual.
A vertical antenna will require radials or a ground screen as in item three above but does not need a direct connection to the soil. Horizontally polarized antennas like dipoles, most EFHWs, and double-whips will be de-tuned by a ground connection. In many public places, it is not allowed to drive stakes or rods into the ground.
What about lightning protection?
In a portable or mobile setup, the best advice during storms is to lower the antennas to the ground, disconnect the feed line and secure it at least six feet from the station. There is little you can do to protect your equipment from a lightning strike in the field. Take shelter yourself! If you’re in a vehicle and lightning is striking nearby, close the doors and try not to touch any metal until the storm passes.
***
This article touched on some of the important aspects of dealing with the strong RF you’ll encounter when operating a portable station. In the next article, I’ll discuss some concerns for RF safety in these setups, an often-overlooked aspect of setting up away from home.