
No matter what kind of operating you do, sooner or later you’ll need a “gadget” that isn’t readily available commercially.
Maybe you’ll need a special switch or an interface between connector types or to a radio accessory port. After making one or two of these, you might develop a taste for homebrewing of the electronics variety! Many hams started small and wound up making equipment that rivals professional quality.
One thing you’ll learn quickly, though, is that nice-looking metal enclosures are surprisingly expensive. Even small boxes can cost as much as the electronics inside them.
To keep the cost of building reasonable, I’ve learned to make use of less-expensive materials to make my own, particularly when building something for the first time or just trying out an idea. Low-cost materials encourage prototyping and trying out alternatives—you can then use the money saved on a better enclosure for the final version. Or you might find the inexpensive alternative to be a fine permanent solution.
Here are some tips and tricks that have served me well.
Basic Boxes
One of your most useful discoveries will be that specialty products sold for electronics are often quite a bit more expensive than a very similar product made and sold as consumer and commodity products.
This is true for more than just metal boxes!
If you can use something made and sold by the zillion, you’ll save a lot of money, especially if you are willing to accept a different shape or can modify a commercial product. For example, electric fence insulators and PVC pipe, or conduit fittings, are much cheaper than ceramic insulators!
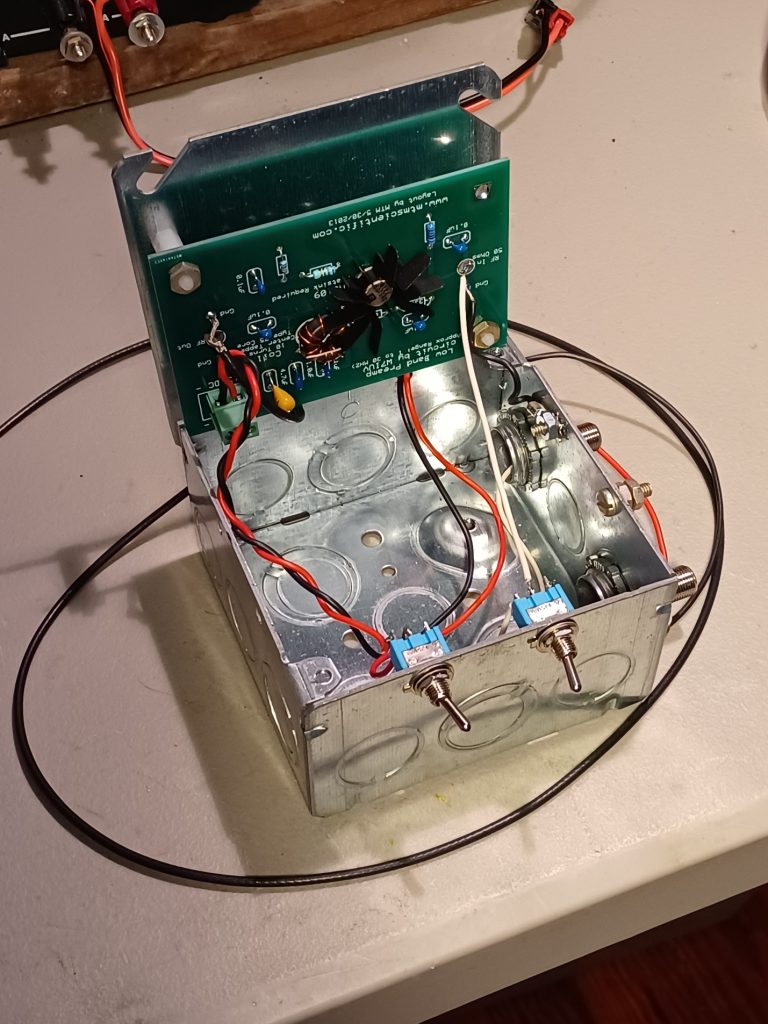
My favorite source of project enclosures is products made for electrical wiring parts, especially the junction and switch boxes. You can see several examples in the photos below. The boxes are sturdy and cheap, and they are galvanized or plated. They make good shields since they are metal, which is extra important in the ham station where RF is present everywhere.
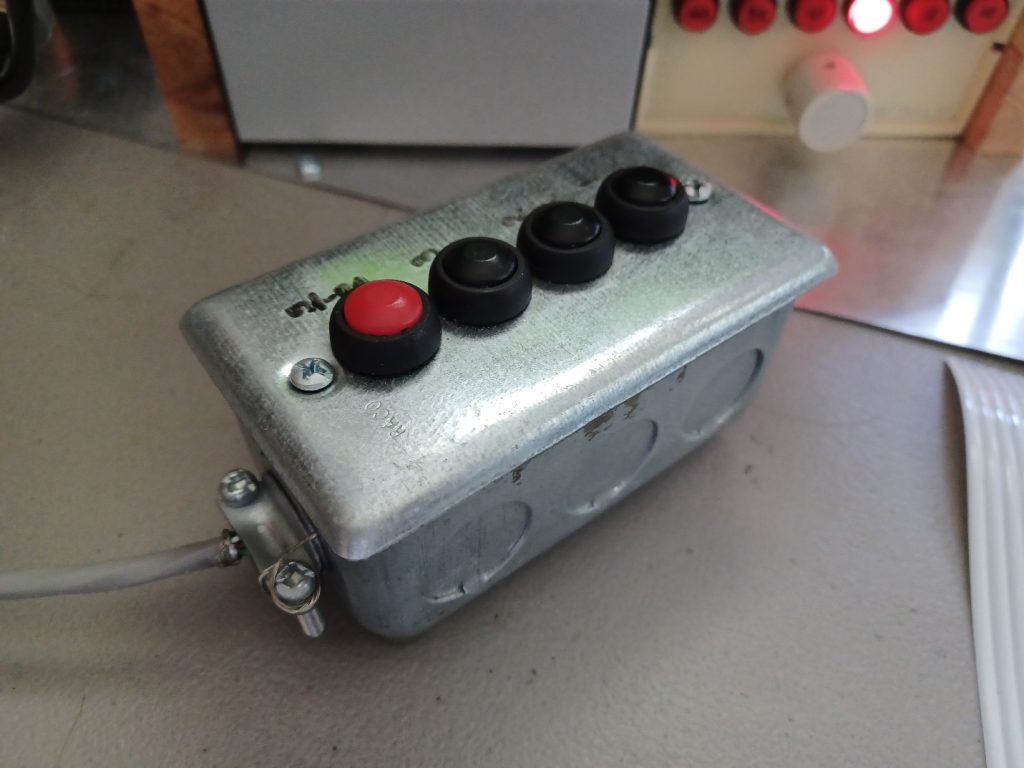
Most of these boxes have convenient holes for grounding and bonding connections. The boxes are inexpensive so if you make a mistake or decide to change a layout, you can start over very easily and cheaply. Ganged boxes can be joined together to make larger boxes. There are quite a variety of these metallic boxes available online or in the electrical section of your local hardware stores.
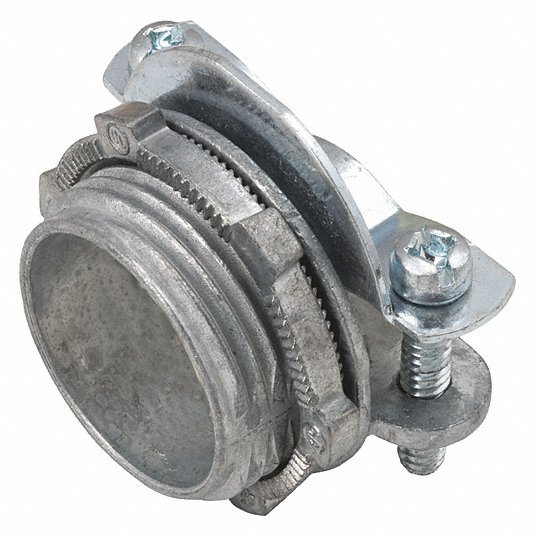
Electrical boxes have round “knockouts” for attaching conduit and cable clamps. There are three common sizes specified as “trade sizes” of 1/2, 3/4, and 1 inch. They mount in the body of the box with a small tab. Push on the knockout with a screwdriver to bend the tab, then flex it back and forth to break the knockout free. Threaded conduit clamps mount in the resulting hole. There are a large number of clamps and parts that mount in knockouts for different purposes.
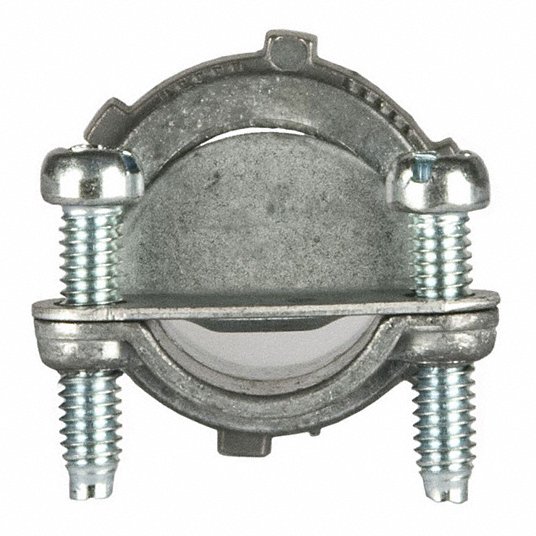
Rubber grommets are available to avoid chafing a cable.
The conduit clamp is threaded and mounts on the box with a large nut similar to a toothed lockwasher. Tighten it by tapping on the nut’s serrations with a screwdriver while holding the clamp with pliers. The clamp is flat-sided to capture electrical cable and is tightened with screws. The clamp will also capture the flat side that is present on most threaded RF connectors.
Smaller connectors, such as phono or phone plugs, will probably require a drilled hole or you can enlarge a pre-drilled hole. Another option is to use a pair of large flat washers to both fill the hole and hold a threaded connector.
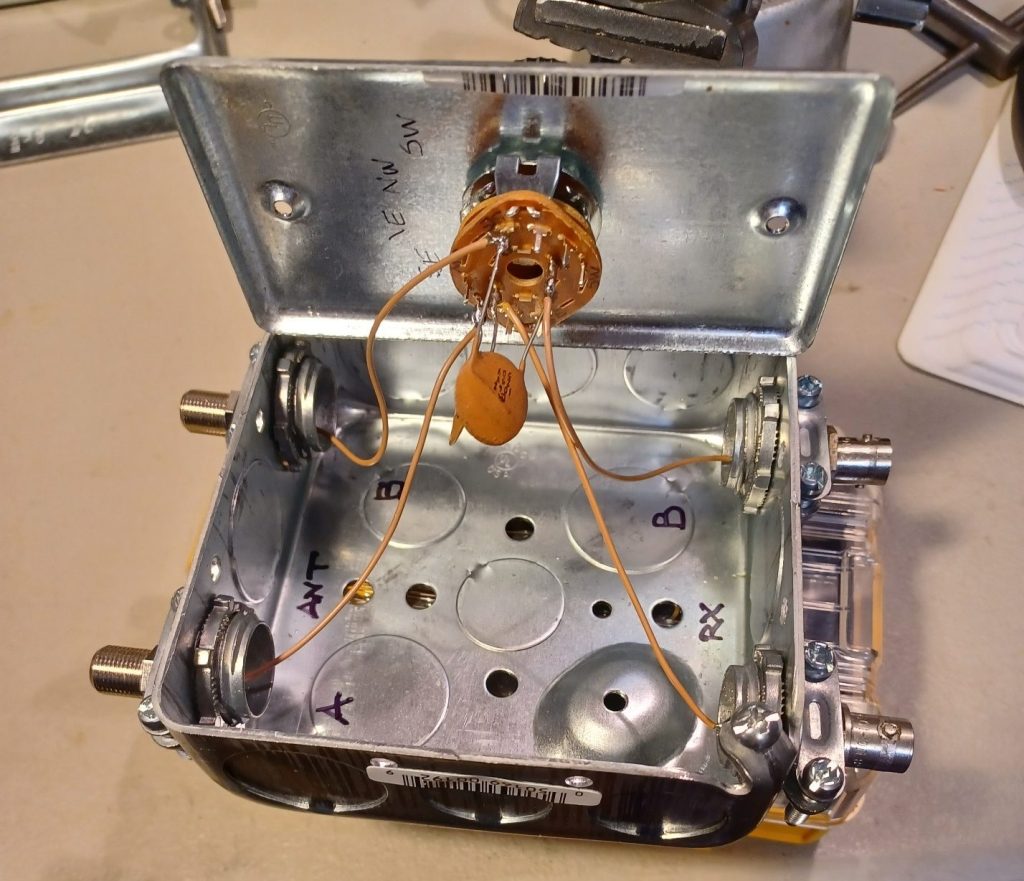
If you are running coax or other shielded cable through the clamp, create a pigtail from the shield braid or wire that is long enough to wrap around one of the clamp screws. This allows you to make a good connection to the metal box.
Another nice thing about electrical boxes is that they are heavier than a similarly-sized aluminum or plastic box. This helps keep them in place when cables are attached or if controls or switches mounted on them are used frequently. Rubber or plastic stick-on feet work as well on steel as on aluminum, but be sure to clean the surface first since there may be some lubricating residue left from the manufacturing process.
Noise Pickup
A caveat about using plastic enclosures—unshielded enclosures for RF projects can allow common-mode noise to get into feed lines. (Noise refers to any unwanted signal picked up on the outside of the shield.) Noise currents flow to the end of shield on the outside and then enter the cable as a differential-mode signal.
If you can’t shield the enclosure, consider feed line chokes from ferrite cores on the cables to block the noise currents.
Surplus and Used Enclosures
An often-overlooked source of project materials is surplus, overstock, or used equipment. Popular online auction websites are a good place to find enclosures and other materials. Local sources include Craigslist and free “buy nothing” sites organized by location. You will also be able to find “service pulls,” which are equipment and devices designated as past their service life. You may have to buy several to get the best price, so share the savings with friends!
Along with hamfests, flea markets, and garage sales often include electronic gear that can be stripped for parts and hardware, with the enclosure left to be reused. Equipment cabinets for outdoor use, like the fiberglass box I bought surplus, are usually weatherproof, too.
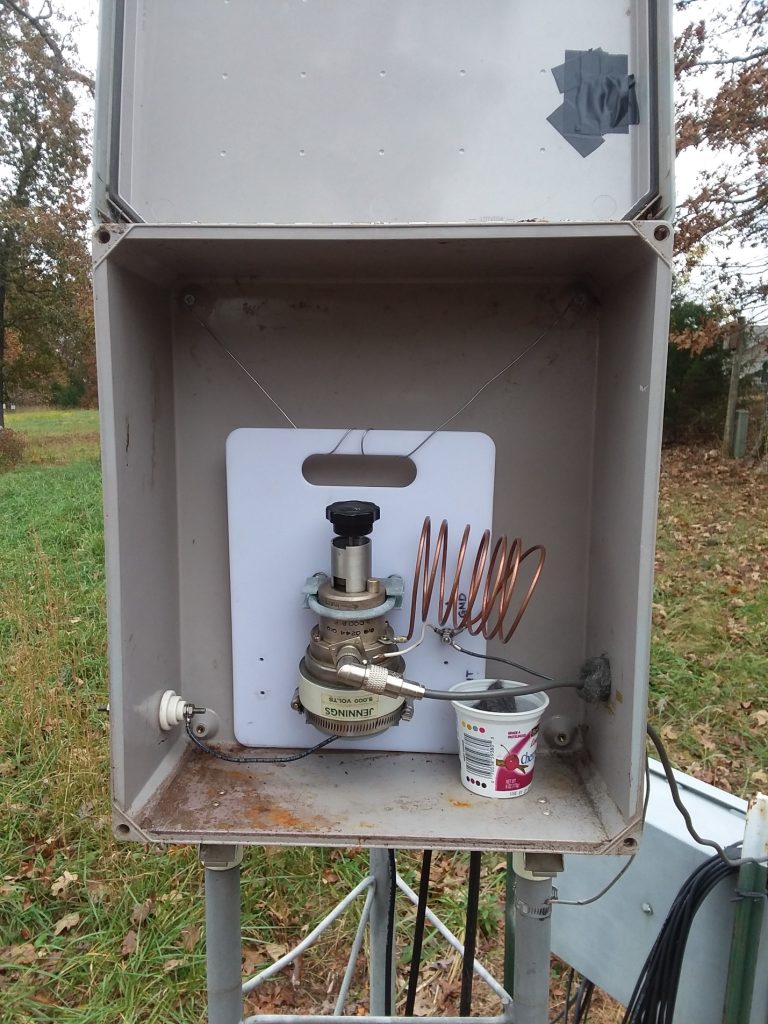
Data and cable TV service boxes are widely available as surplus and usually have a basic weather-resistant cable entry. They are mostly plastic and unshielded but make good protective enclosures for cable connections and smaller devices.
The photo below shows such an enclosure used to hold a control circuit for switching a pair of receiving loops. Feed lines come in through the foam inserts at the bottom.

Obsolete instruments and equipment are usually constructed with solid, high-quality cabinets that cost a lot new. Panels and other metal parts can be cleaned in the dishwasher. Disassembling this type of equipment is an education in how electronic devices are assembled and provides a lot of useful hardware.
Taking this stuff apart is a great project for beginning electronics and ham radio hobbyists to build expertise (and a junk box)!
Holes in used enclosures can be filled with metal “hole plugs” that snap in place. Large holes can be covered with a piece of unetched PC board material or scrap sheet metal to maintain shielding. Older outdoor enclosures, particularly fiberglass or plastic, should be painted with automotive primer to protect and seal the surface.
Food and Novelty Containers
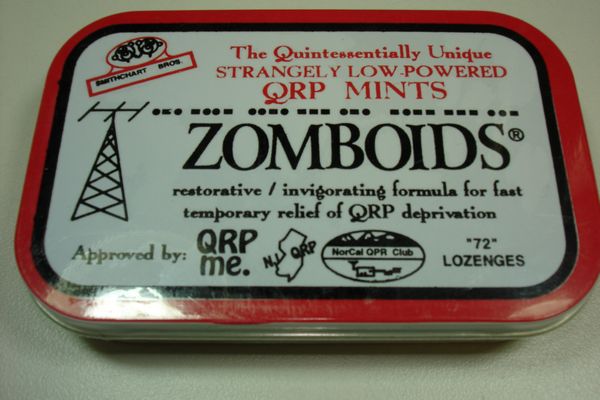
A popular activity in the QRP community is to build gadgets in the snap-together tins that hold Altoid mints. After all, they say, if the mints themselves were “curiously strong,” then why not the signal from a transmitter built in the same container?
There are even prototyping kits based on the tins such as this product from QRPme.com.
Don’t expect heavy-duty use from these lightweight, nearly disposable items. They are often painted and need to be scraped or sanded to bare metal around connectors and any overlap joints you expect to act as shielding. There are a variety of sizes from postage stamp-sized to large cookie and chip tins. The metal is quite thin, so drill with caution or use a punch to avoid tearing the metal. People have come up with all kinds of projects for candy tins, such as this Instructables collection.
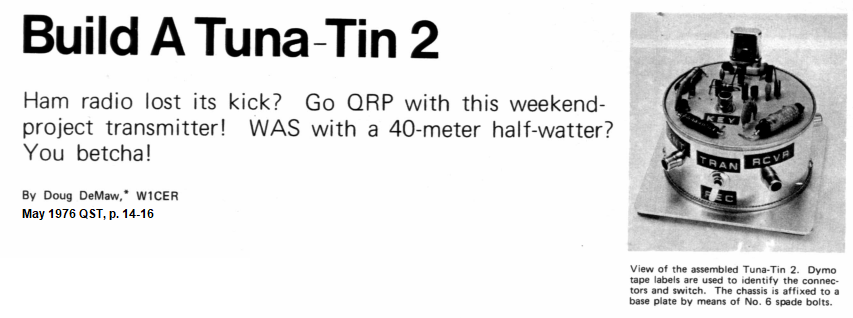
Not only candy tins are pressed into ham service. Even tuna fish cans get into the act, like the legendary “Tuna-Tin 2” 40 meter transmitter. You can read all about this Doug DeMaw, W1CER, creation from 1976 at DIYRadio. Cans make great sub-enclosures in larger projects, too.
Hobbies and Crafts
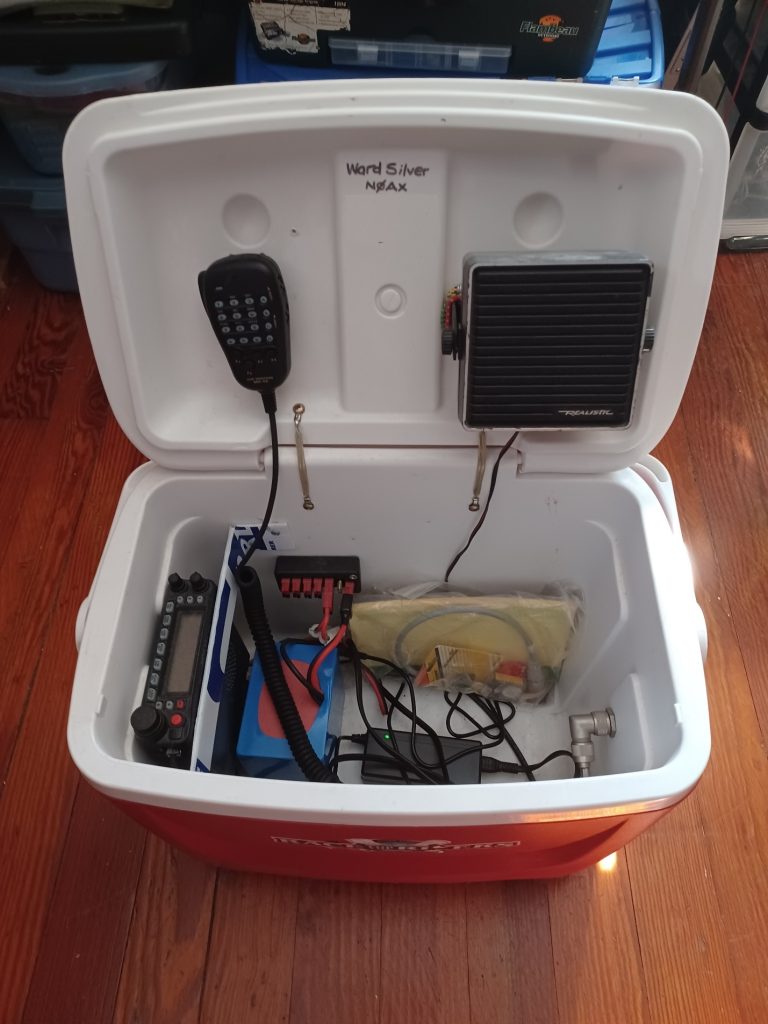
Finally, hobby, outdoor, and craft stores sell a wide variety of containers and boxes that can be used for electronics. Metal toolboxes make very nice enclosures for electronics, particularly portable or mobile radios, and can even serve as a ground plane for a mag-mount whip! They are often lockable as a bonus. Larger coolers can carry an entire station, may have wheels, and are almost always water-resistant.
My VHF/UHF emergency communications station in the photo below was built in one such cooler. Watch for seasonal sales at the start of camping, fishing, hunting, and boating seasons.
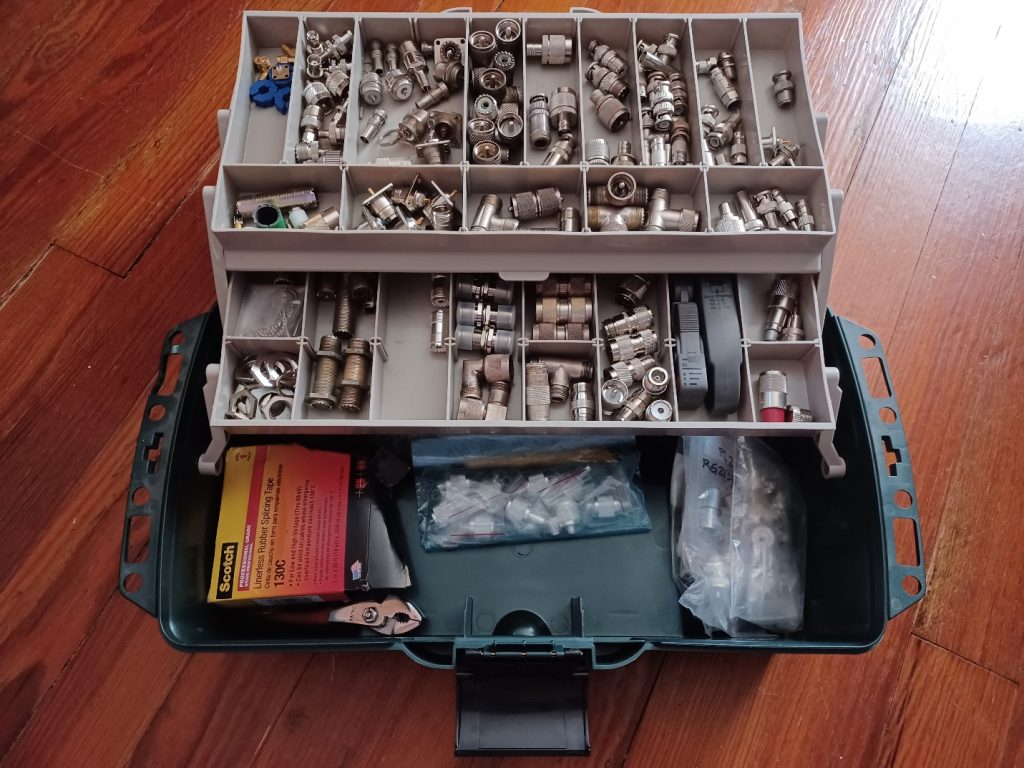
Although they aren’t often used for projects, tackle boxes, compartmented trays, and storage boxes come in very handy.
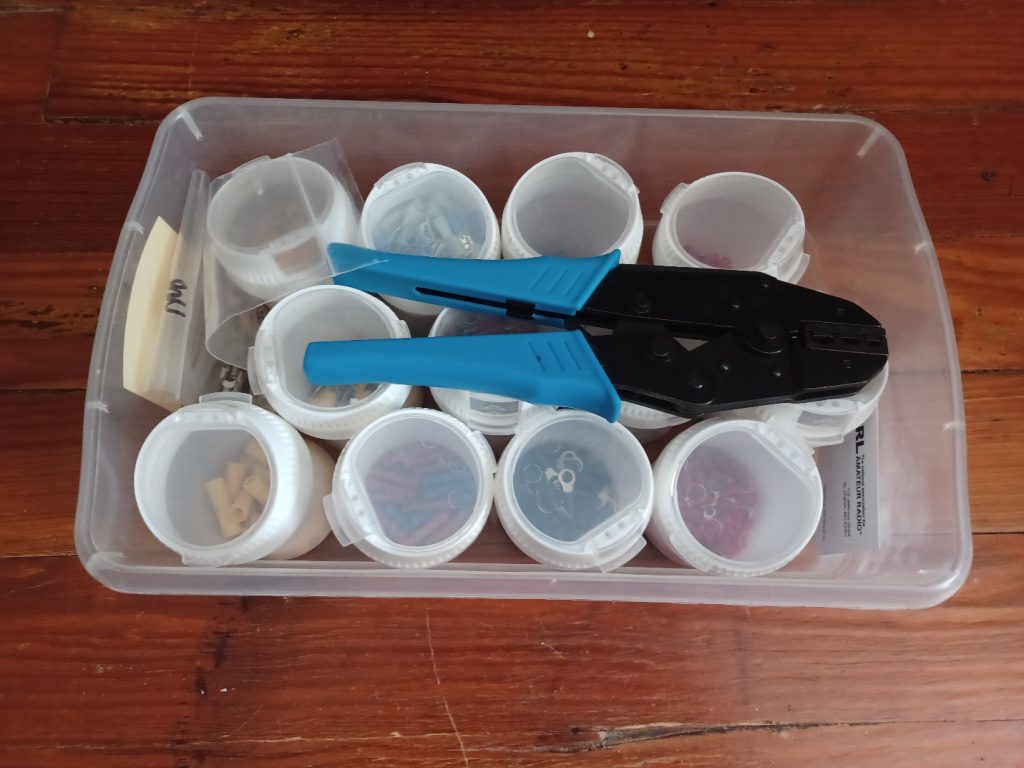
These can be used to keep connectors, parts, and hardware organized and ready for action in the field. I save my chewing gum and peanut butter jars to make great hardware kits, even including a crimping tool with the terminals so everything is kept together and sorted.
The Eye of the Beholder
I hope this article gives you the idea that useful materials are all around—not only for enclosures, but for hardware and accessories, too. Using inexpensive materials lowers the “barrier to entry” for building your own gear and will make you a more capable and flexible homebrewer.
Editor’s note: For those less inclined to homebrew enclosures, you’ll find the DX Engineering Utility Enclosure Kit at DXEngineering.com. Check out this article on ways customers have put the DXE-UE-2P Utility Enclosure to work around their stations.