Let’s start with a story about how NOT to strip wires. Back in the day, I worked with a fellow who had the unique talent of stripping wires with his teeth!
Well, just two of his teeth, actually.
It seems that at some point in his youth, he chipped the adjacent corners of his two front teeth just a little bit. The size of that little gap was just right for hookup wire, telephone wire, and all sorts of other wires. He would put the wire between his teeth, bite down just a little, and pull. Voila! Wire stripped and insulation spit out.
DON’T TRY THIS AT HOME!
Lucky for us, there are many great and inexpensive tools for getting insulation off of wires. You might only need to do that occasionally or you might need to strip dozens of wire ends. Whatever your need, there is a tool for you.
Let’s start with the most common and inexpensive manual stripper.
Basic Wire Strippers
My first order of business is to warn you about the too-cheap, no-name combo tools. While it might be nice to have one of those in the glove compartment for emergencies, they really aren’t quality workbench and toolbox tools. Good tools will last and last while doing the job right, so spend the extra few bucks on a “real” wire stripper from a solid tool company. If you need to spend a few bucks to qualify for free shipping, you could do a lot worse than to buy a good spare stripper.
Below is the Klein 1010, a basic wire stripper from Klein Tools, a well-known and trusted name in the electrical industry. As you can see, it not only strips and cuts wires from 10-22 AWG but crimps terminals, cuts small screws, bends wire, and has small plier jaws.
All of these functions are demonstrated in this handy video, “8 Wire Stripper Features Everyone Should Know.”
This is a low-maintenance tool. Keep it clean and free of rust and it will be your toolbox buddy forever.

Once I discovered it, I’ve used the small-screw cutter many times, making a short screw that was just right for the job. The important thing is to insert the screw so that after it’s been cut, you use the threaded part of the cutter to clean and re-align any distorted threads as you removed the screw. And sometimes, the little studs that are left can be used to join nuts or spacers.
You can tell I never throw anything away!
If you do a lot of home AC wiring, you can also find heavier strippers designed for the Romex-style cable and wire sizes you’ll encounter in those jobs. These will do a better job than the small strippers for electronic and radio work. They are also a little easier on your hands for the harder squeezing and pulling necessary for that type of work.
The pocket-friendly Squirt ES4 is a nice variation in the Leatherman line of multi-tools. Widely available used and occasionally new or in similar models, it includes a dandy little combination of wire stripper/cutter/needle-nosed pliers.
Folded up, the tool is less than two inches long. You’ll forget you’re carrying it, which is a bad thing if you try to take it through airport security! I’ve had to give up a couple of these that way, which is probably why they’re available used! Larger Leatherman multi-tools are also available with wire strippers.

Using manual strippers is pretty straightforward: insert the wire into the appropriate hole, squeeze, and pull. But there are a few fine points:
- Be sure to use the right size hole, otherwise you’ll nick solid wire (leading it to break when bent) or cut off strands of stranded wire.
- Using a too-large hole means you’ll get a ragged edge on the insulation and often pull the wire out of a multi-conductor cable.
- Don’t rock the stripper back and forth because that will nick the wire. If you have to do this to get the insulation off, either you’ve used the wrong hole or the jaws are dull and the tool should be replaced.
- Pull the wire straight through the stripper and don’t bend it, causing nicks and cutting strands.
- If you find the stripping force pulling one wire out of a multi-conductor cable, use needle-nosed pliers to hold the wire while it’s being stripped.
Using a diagonal wire cutter as a stripper is a skill many of us old-timers have developed. Like my friend with the chipped teeth, there is a knack to doing it without damaging the wire. A gentle squeeze will put a nick in the insulation which will then break and slide off the wire. This will only work reliably on insulation that breaks cleanly and won’t leave a clean edge on the insulation.
Automatic Strippers
Sometimes you’ll find yourself faced with having to strip many wires for a big wiring job or preparing multi-conductor cable for a rotator or control circuit. If you are installing crimp terminals or connector pins, you need to strip all of the wires consistently and with the right length of exposed wire. This is where a self-adjusting wire stripper comes in very handy.
Properly set, these strippers will make a consistent, clean strip over and over. That results in higher quality work with better reliability.
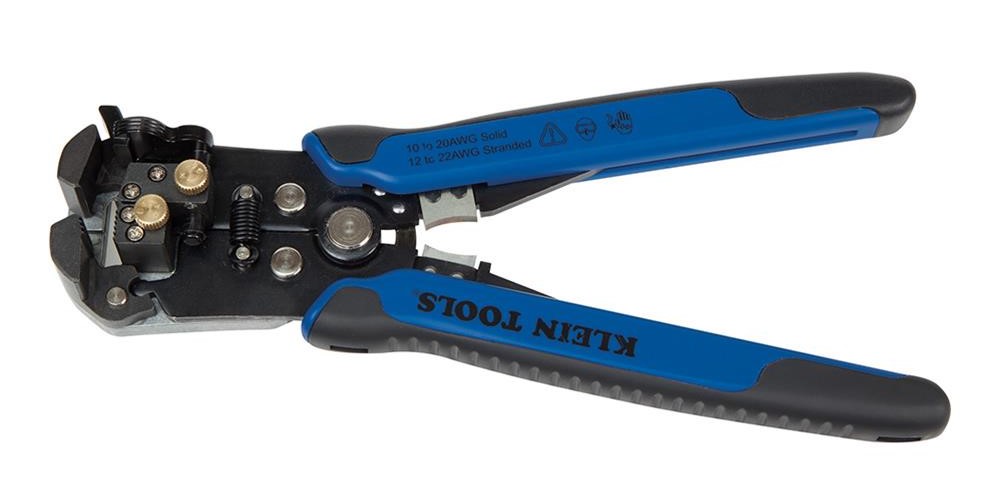
Another item in the Klein Tools catalog, the Klein 11061 is a typical example of these tools. They don’t have all of the accessory features of the 1010 but make short and consistent (there’s that word again) work of stripping a lot of wires. After you insert the wire between the jaws, squeeze the handles—the jaws clamp the wire, and the blades come together to cut and pull off the insulation.
Here’s a video of how to use it and how they work

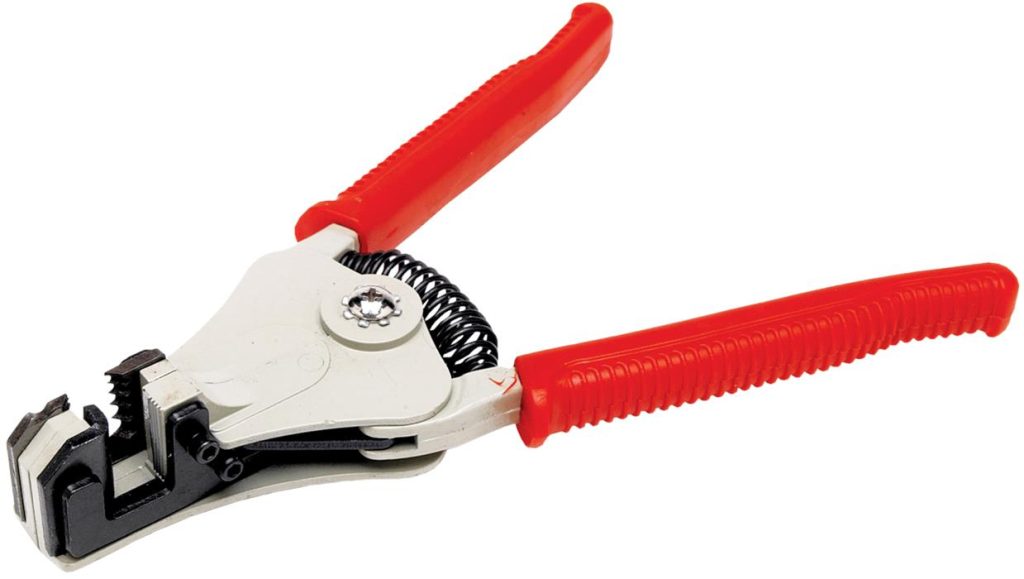
The Performance Tool W200 is a variation of the automatic strippers. It has jaws to hold the wire and a pair of cutting blades that come together and pull off the insulation. The sequence is completely automatic and the design of these tools to make this sequence happen is pretty nifty.

Pistol-grip adjustable automatic strippers are also available, such as the Tool Aid 19100. The wire is inserted in the end of the jaws until it contacts the adjustable stop. Squeeze the jaws and the tool does the rest. This tool is intended for smaller gauge wire from 12 to 22 AWG.
I’ve used all of the different types of strippers and each has their appropriate role. I carry a manual and an automatic stripper in my tool kit. These are also fairly inexpensive and worth adding to your tool roster. You might also enjoy Adam Savage demonstrating how these work in this entertaining video.
Stripping Enameled Wire
So far, we’ve focused on wire with plastic insulation, and that is most of the jobs you’ll encounter. However, if you wind toroids or impedance transformers or baluns, it’s common to use enameled wire which is harder to strip. You want to avoid nicking the wire with a cutter or knife—it will break from mechanical or thermal flexing—so a different technique is required.
A convenient method for occasional use is to use sandpaper or emery boards. A small strip of sandpaper held between your fingers to squeeze the wire is an easy skill to learn. Squeeze the wire, rotate it, and pull it in and out of the sandpaper. This scrapes off the enamel without damaging the wire underneath.
This video shows how to do it properly.
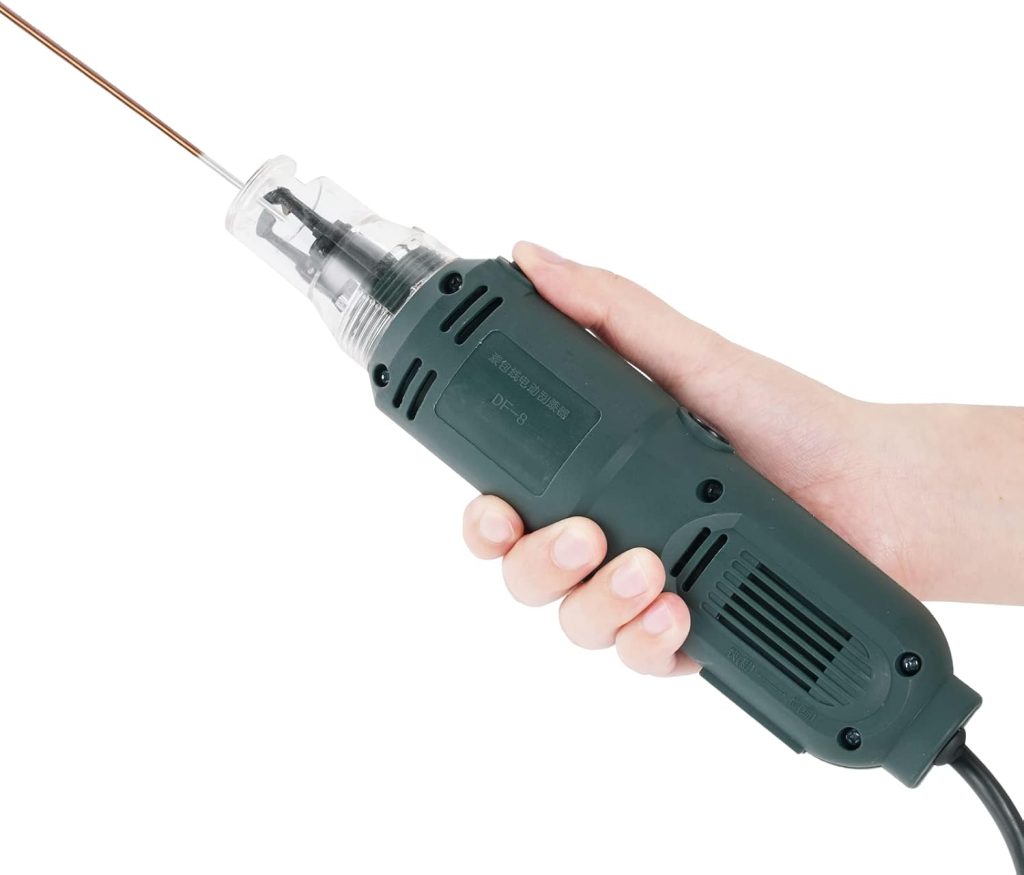
If you have a big project with a lot of inductors or transformers, you can save yourself a lot of work (and sore hands) by using a power tool to scrape off the enamel. The Abisofix tool shown in the photo and this video will do the job on a wide range of wire sizes from 12 to 24 AWG. For very fine wires, the manual method is best for the home builder.

Removing Heavy Insulation
A situation you’ll encounter frequently is removing the outer insulation from multi-conductor cables like rotator control or networking cable. If you don’t have a special cable stripper, you’ll have to use a knife or razor blade to remove the insulation. Be sure to use a SHARP, new blade for a utility or craft knife. A dull blade will make this job hard to do well.
- Score the insulation—cut the insulation but not all the way through. You can hold the cable in one hand and cut with the other, but an easier and more controlled way is to place the cable on a work surface and roll it under the blade.
- Do not cut into any of the inner conductors. It’s best to cut too shallowly at first, then go deeper as needed.
- Bend the insulation back and forth so that it breaks along the score. You may need to touch up the scoring in spots.
- Twist the insulation off in the same direction that the individual strands twist.
If you are working with coaxial cable, use a stripping tool for coax if possible. Those tools are well-covered in other On All Bands articles and videos.
However, sometimes you have to strip coax manually. First, when removing the outer insulation, be extra careful not to cut through the fine strands of shield braid. Take your time and work through the outer insulation. Use your sharpest wire cutters when removing the braid. Then repeat the score-and-bend technique to loosen the center insulation.
It’s often hard to pull off coax’s solid center insulation without pulling it partially out of the braid. You can use manual wire strippers to hold the remaining insulation while pulling off the unwanted part. Carefully close the strippers on the center conductor using a stripper hole one or two wire sizes larger than the conductor so it doesn’t nick the coax conductor. Then slowly pull off the center insulation, remembering to twist the insulation in the same direction as the strands of wire.
Use the Right Tool
Just to repeat the message, use the right tool for the job and learn how to use it properly. So many problems in the ham station trace back to connectors and wires breaking or pulling loose. By doing it right the first time, you can save yourself a lot of headaches and keep ham radio fun. No matter what the type of wire or cable, there has probably been a special tool designed for it.
Many are quite inexpensive—don’t you have a birthday coming up?

